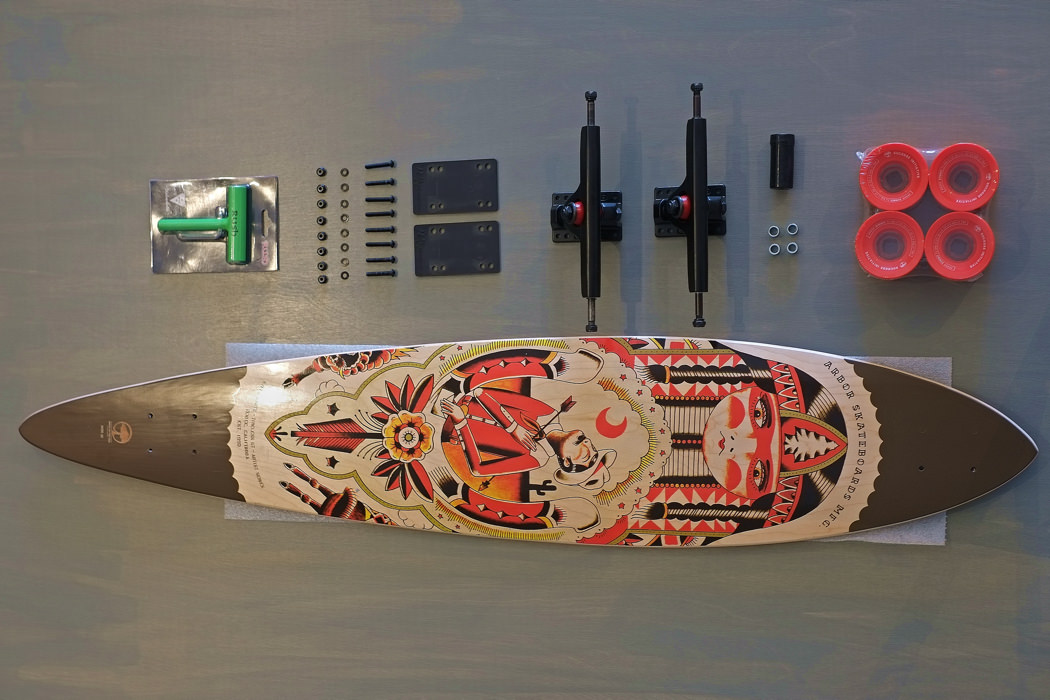
There is something special about building your own board from the wheels up. Visual and hands on assembly can teach new things about the components and how they work together. This article focuses on Top Mount Decks. These are board with the trucks attached to the bottom of the board.
Before you start, make sure to have bare essentials to get you rolling; trucks, wheels, and bearings. If you haven't assembled them, read our How To article.
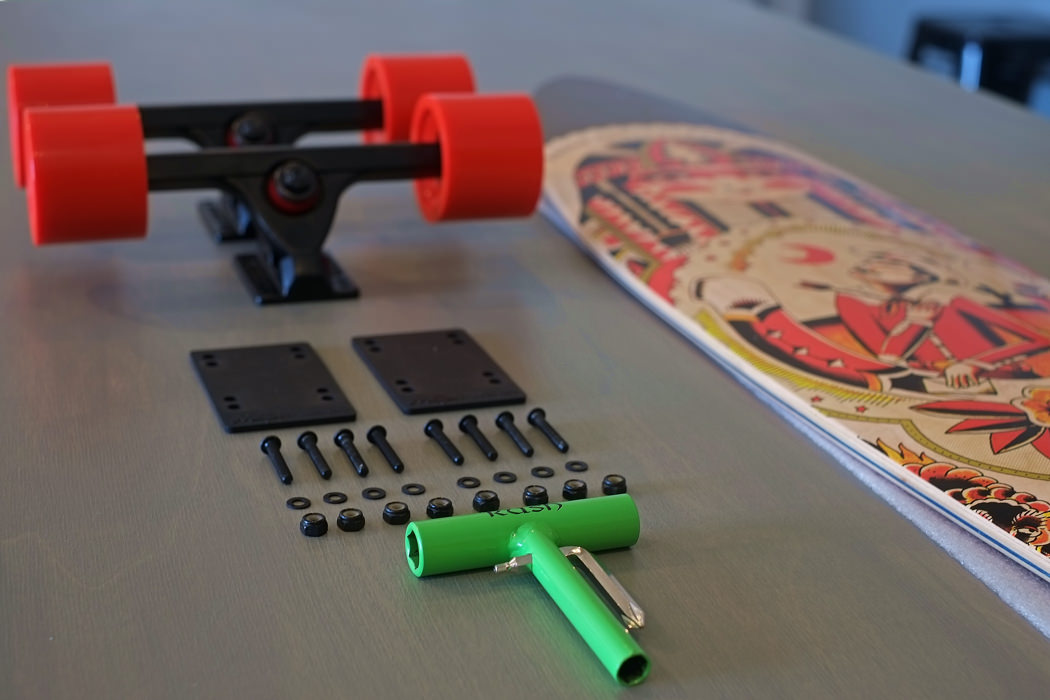
You will need
- 8 Bolts
- 8 Nuts
- 8 Nylon Washers
- 2 Risers
- 2 Trucks
- 1 Skate Tool
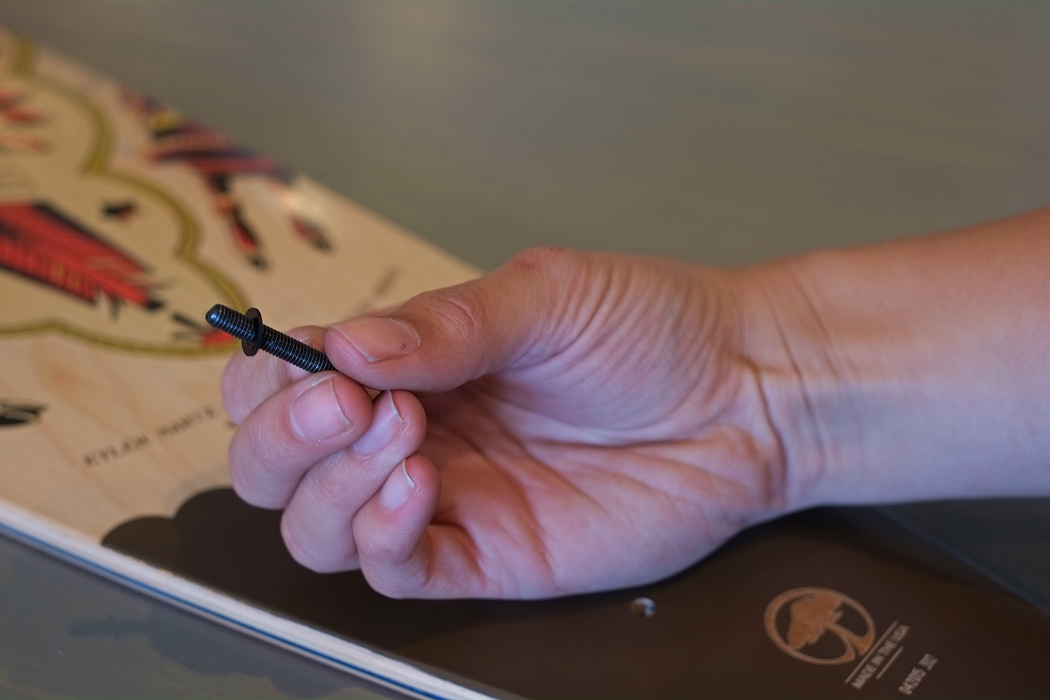
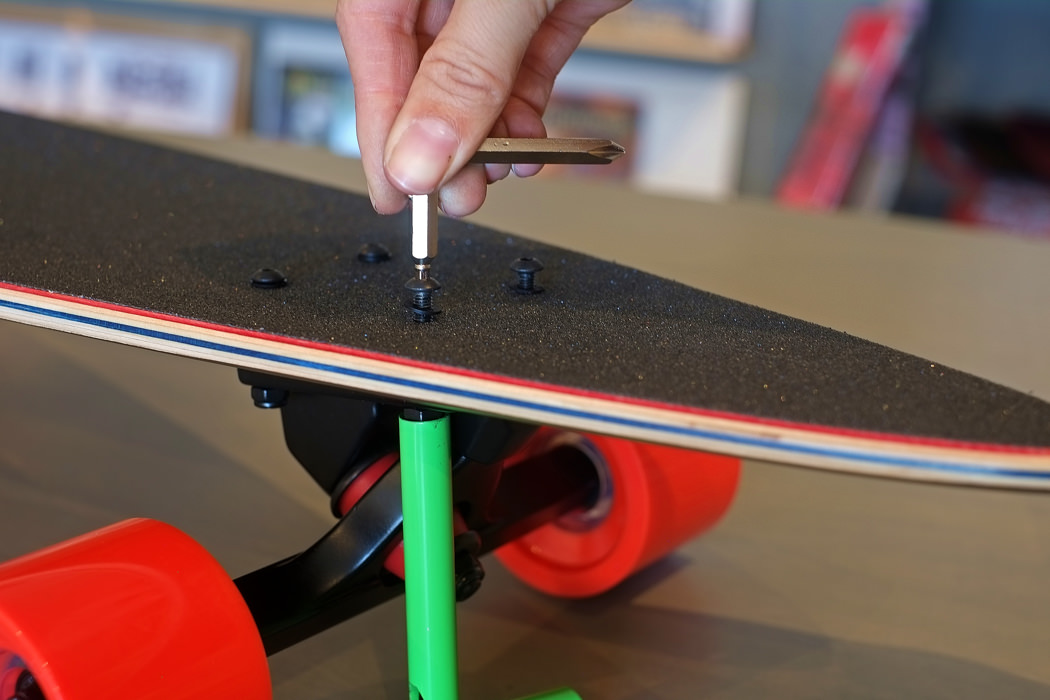
#1
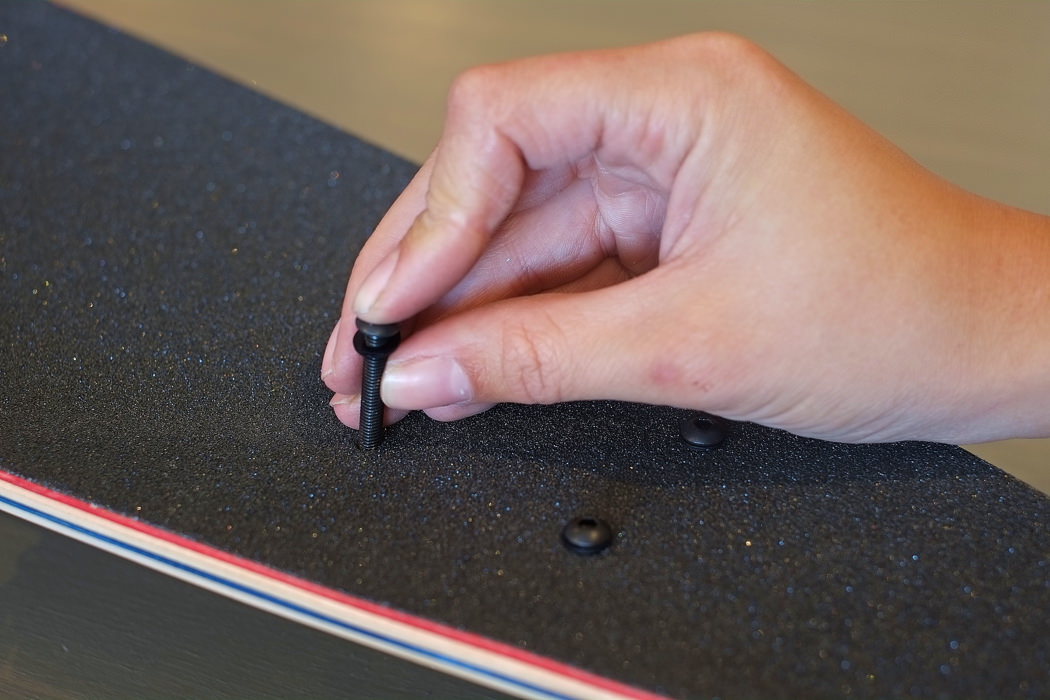
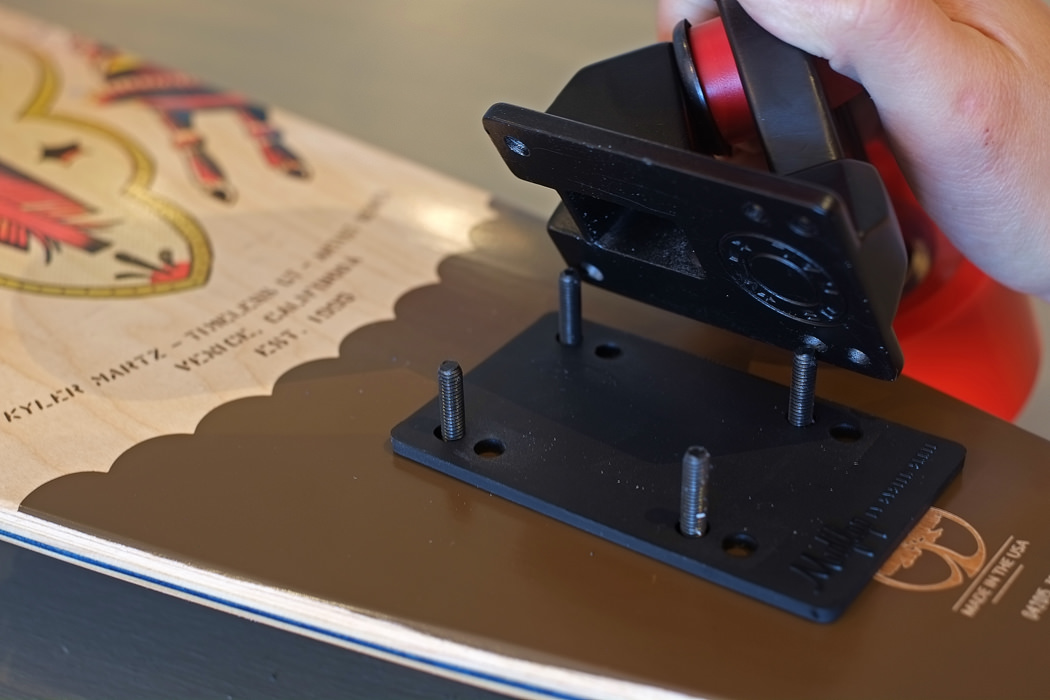
Put a washer onto the hardware bolts. This protects the top of the deck.
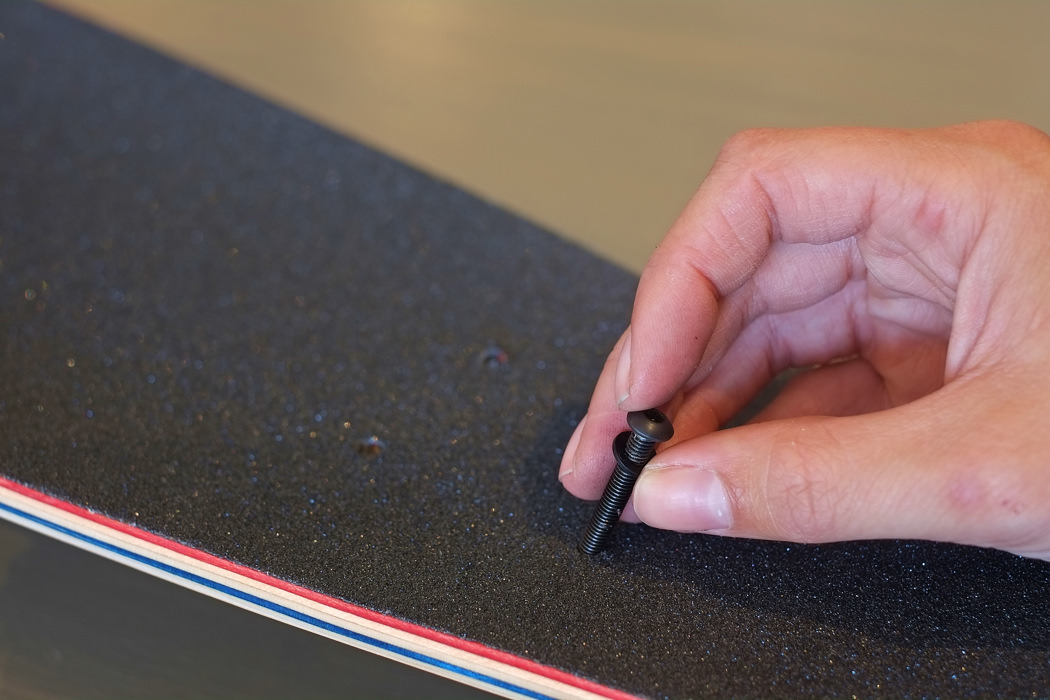
#2
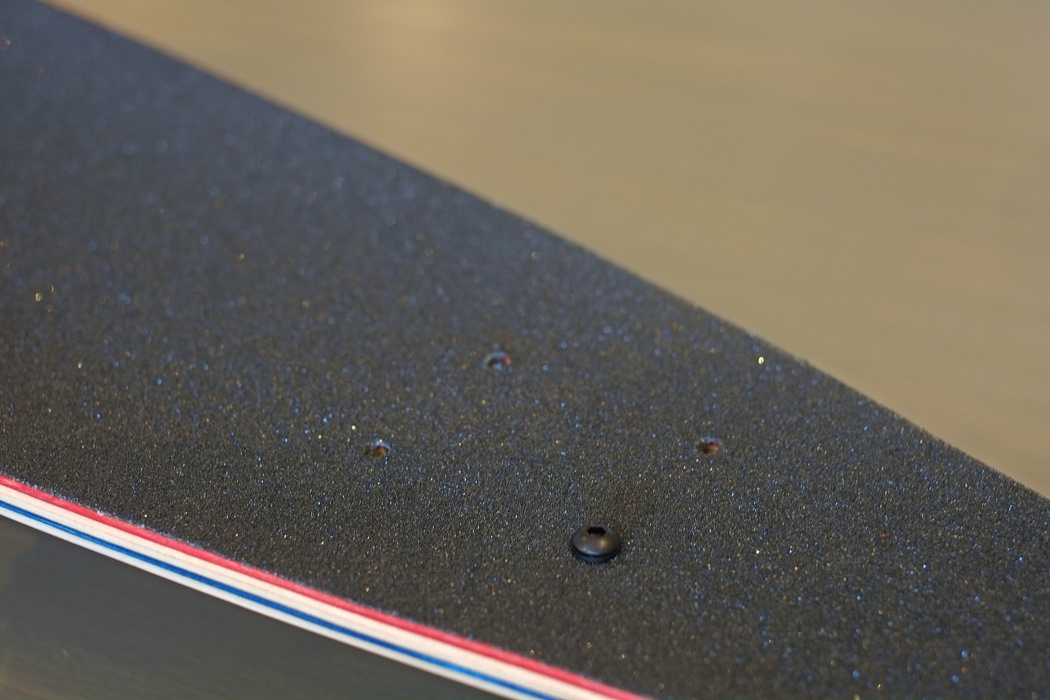
Slide each screw through the pre-drilled hole mounts on the deck. Decks may have new school, old school, or both styles of hole mounting. Pick whichever hole mount is compatible with you trucks.
Grip tape can block the tunnel, causing more difficulty. You may need to use you skate tool to encourage the bolt through the hole.
#3
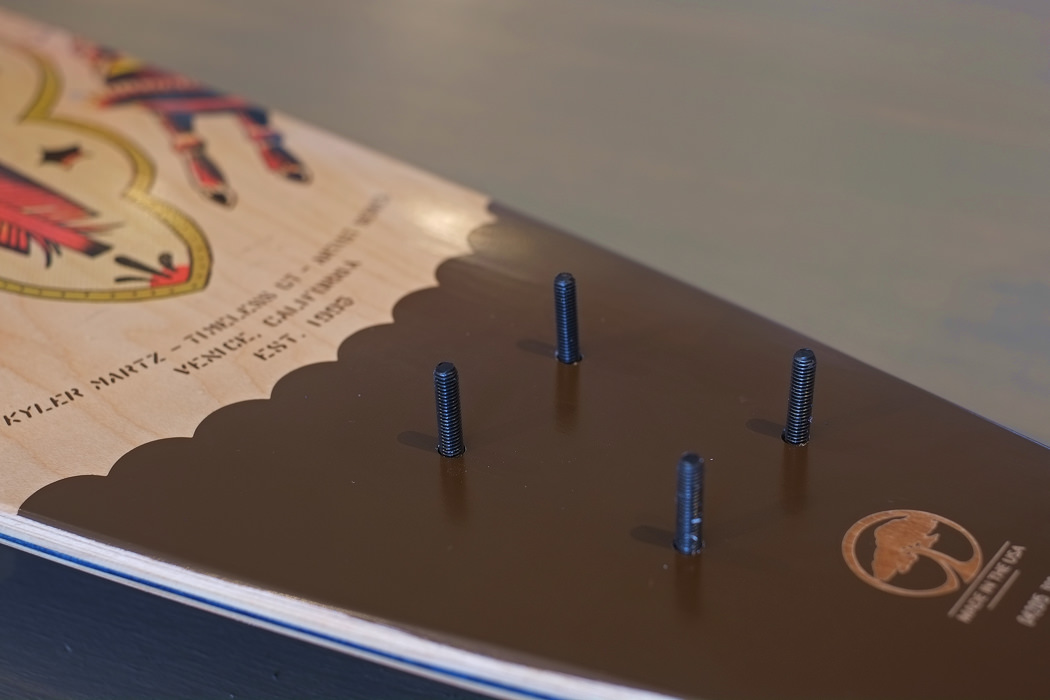
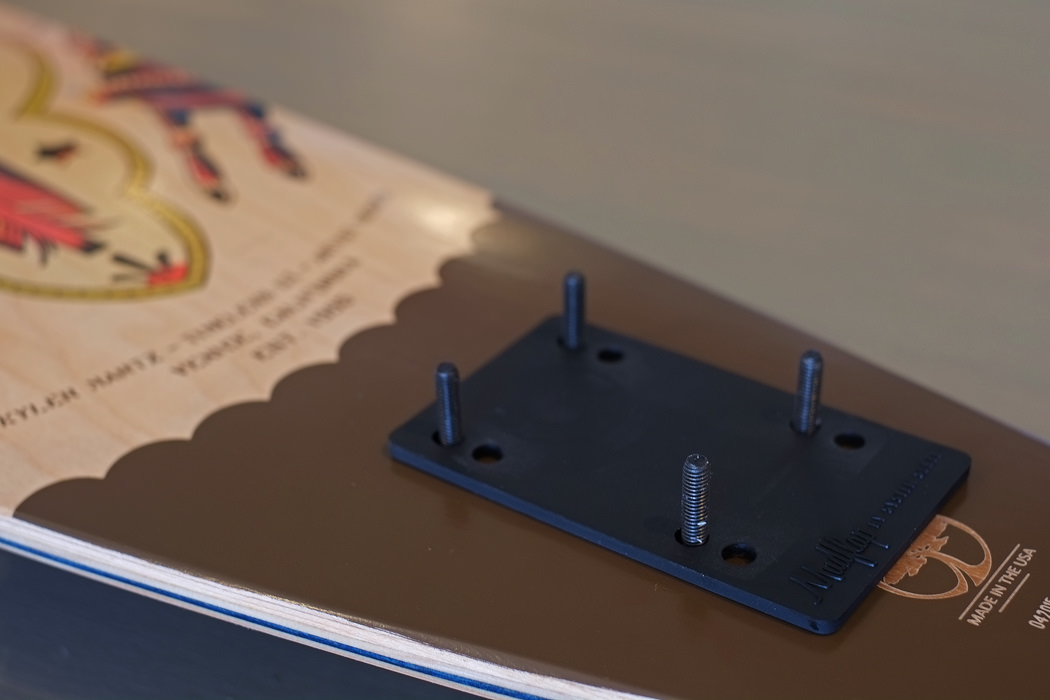
Mount the riser onto the bolts. Most risers have new and old school hole patterns.

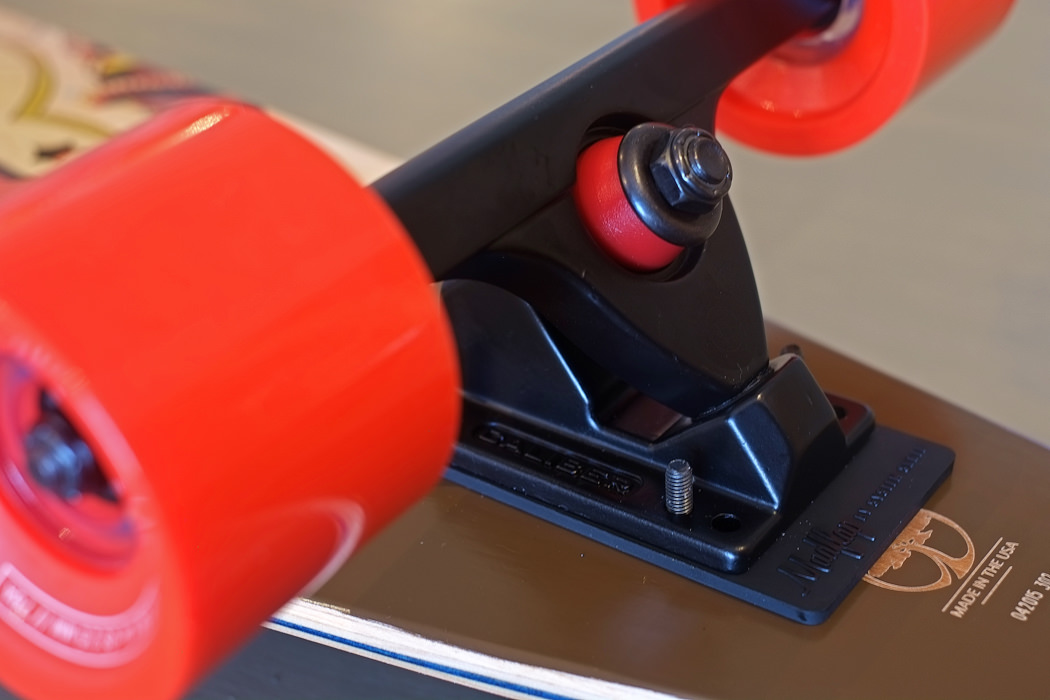
#4
When mounting Reverse or Standard Kingpin trucks, the pivot cup always faces out. Line up the holes on your truck to the bolts and press down. If the bolts get pushed out, make sure you are using the right hole pattern.
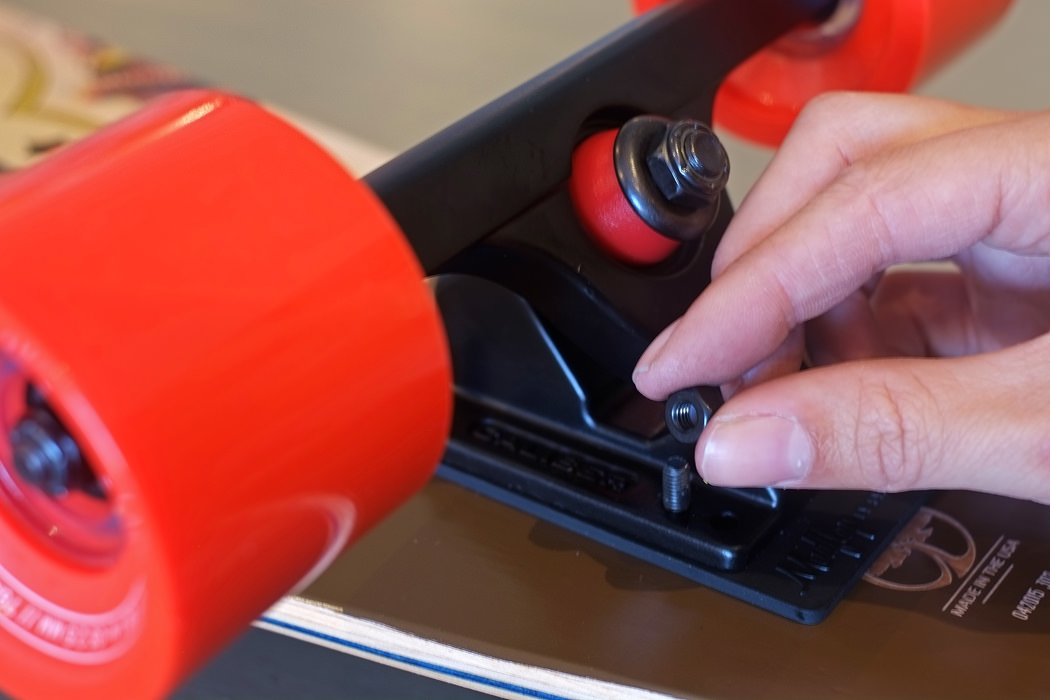
#5
Once all four bolts are through, add the nuts. Use a phillips or allen head to keep the bolt from spinning. Tighten the nuts with a skate tool or wrench until the bolts are tight. No one wants a loose truck!
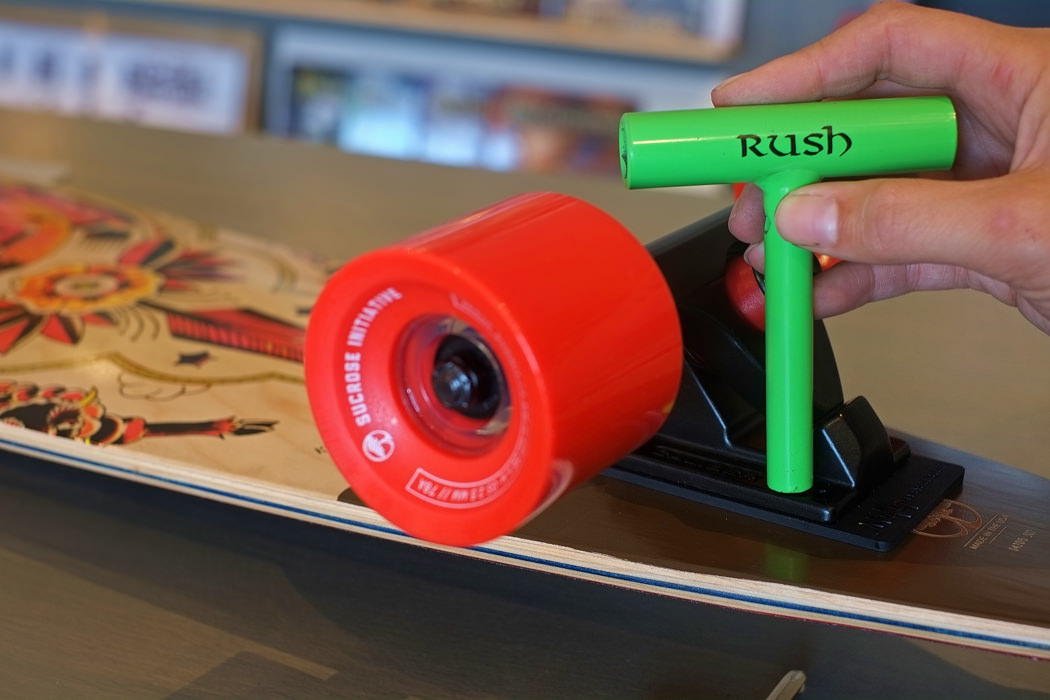
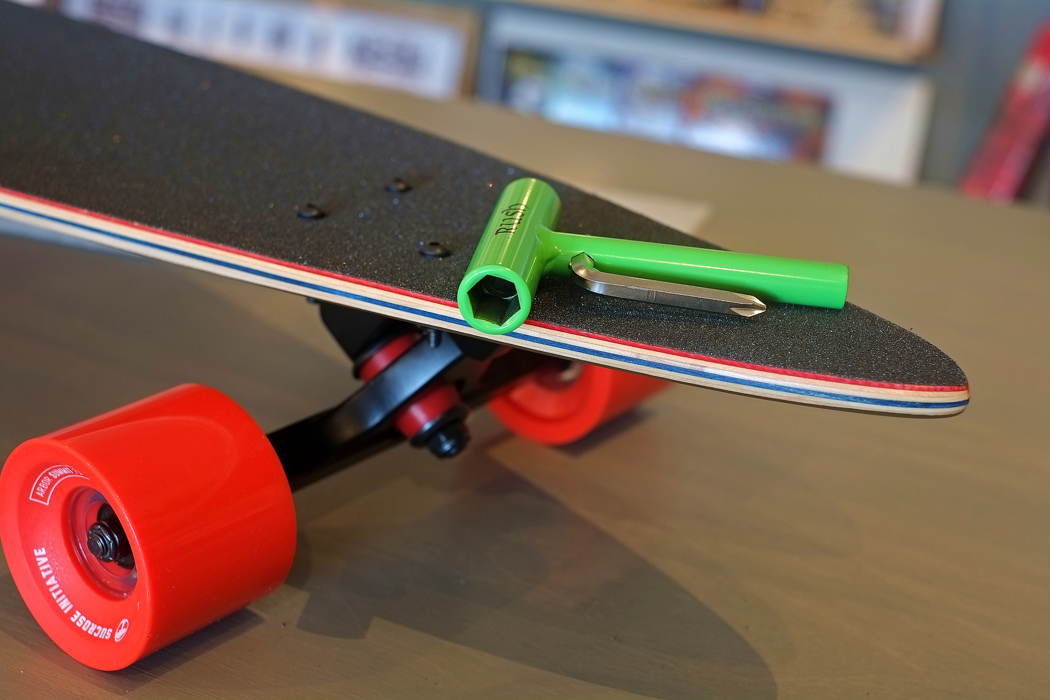
Repeat steps #1 through #5 for the second truck.
You're ready to ride! Remember to check your hardware every time you skate.